
Almost nobody wants to put a hole in a $90,000 RV roof, a leased van, or a boat’s fiberglass cabin top. And you don’t have to. A Starlink Mini weighs about 2.4 lbs and presents a small surface to the wind, which puts it comfortably inside what magnets, suction and clamp hardware can hold — if you match the method to the surface and mount it in the right place.
Short answer
There are four no-drill ways to mount a Starlink Mini: magnetic mounts, suction-cup mounts, 1/4″-20 tripod and clamp mounts, and free-standing ground mounts. Pick by surface, not by preference — magnets need bare or painted steel, suction needs a smooth non-porous surface such as glass or gelcoat, and a tripod or clamp mount works on anything with a rail, pole, ladder or flat spot. All four are reversible and leave no holes.
Quick take
- Most modern RV and camper roofs are aluminum, fiberglass or rubber membrane — none of which magnets stick to. Test before you buy.
- Magnetic is the strongest and fastest option on steel: the Ravion® Magnetic Battery Mount uses four magnets for up to 240 lbs of holding power with 20°–30° adjustable tilt.
- Suction is the answer for glass, gelcoat and smooth painted panels where magnets have nothing to grab.
- A 1/4″-20 bracket makes the Mini compatible with any camera tripod, clamp, pole or suction arm you already own — the most versatile option of the four.
- Sky view beats height. A clear line of sight matters far more than mounting the dish as high as possible.
Why no-drill is usually the better engineering choice
Drilling is not just a commitment issue. On an RV or trailer, every roof penetration is a future leak that has to be inspected and resealed on a schedule; on a rubber-membrane roof, a fastener can also void the roof warranty. On a boat, a hole through a cored deck is a repair job, not a drill-and-go. On a leased vehicle it is a return-condition problem. And on all of them, a permanent mount fixes the dish in one orientation forever, which is exactly wrong for a device whose performance depends on what is above it at any given campsite.
A removable mount also means the dish comes inside at night, which is the single most effective anti-theft measure available.
Ravion® · Built only for Starlink Mini
Run your Mini up to 9 hours, no outlet.
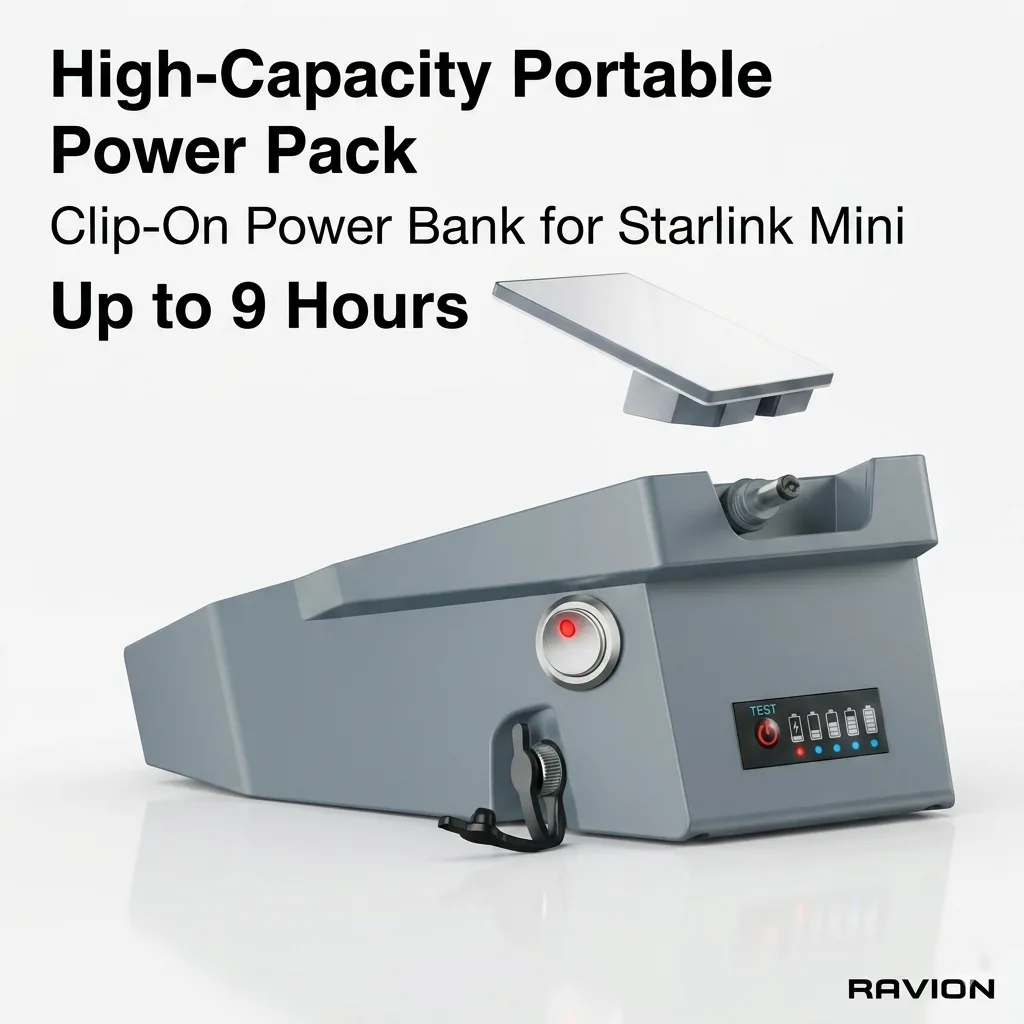
Ravion® Battery
158Wh · up to 9 h runtime · IP65 · 2.6 lbs · Under FAA 160Wh limit
$328 Shop now →
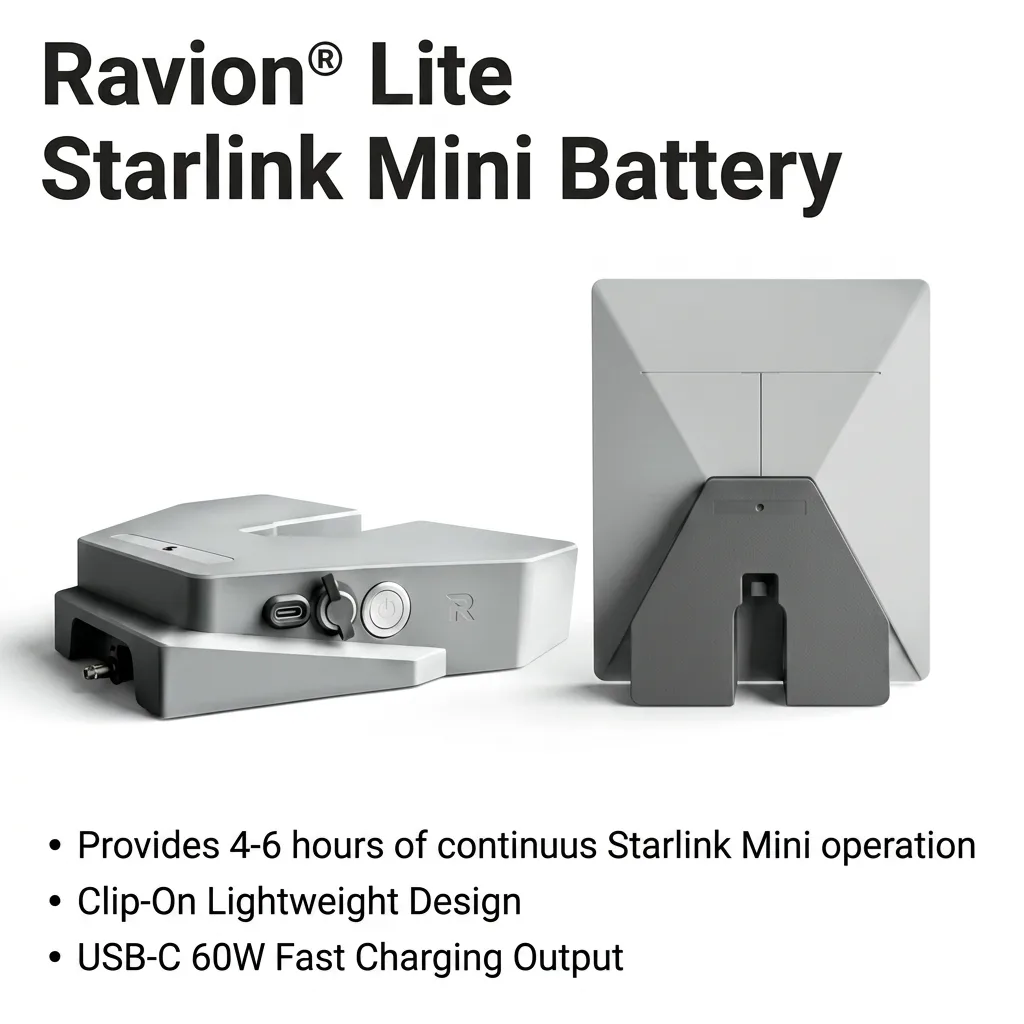
Ravion® Battery Lite
99Wh · up to 6 h runtime · 1.9 lbs · USB-C 60W out
$189 Shop now →
Free U.S. shipping · 30-day returns · 12-month warranty · Ships from California in 1 business day · See all power kits
The four no-drill methods compared
| Method | Works on | Setup time | Best for | Weak point |
|---|---|---|---|---|
| Magnetic | Steel roofs, truck cabs, van bodies, steel radar arches, tool boxes | Seconds | Vans, trucks, steel-roof trailers, work fleets | Does nothing on aluminum or fiberglass |
| Suction cup | Glass, gelcoat, smooth painted metal, smooth fiberglass | Under a minute | Boats, car windows, RV side walls, rentals | Needs a clean, smooth, non-porous surface; re-seat periodically |
| 1/4″-20 tripod / clamp | Anything you can clamp: rails, ladders, poles, awning arms, tripods | 1–2 minutes | Base camps, balconies, boats, photographers | Needs something to attach to |
| Free-standing / ground | Ground, picnic table, roof rack, hood | Instant | Short stops, testing, obstruction-free sites | Trip hazard, theft risk, easy to knock over |
Step one: find out what your roof is actually made of
This is where most no-drill mounting projects go wrong. People buy a magnetic mount, climb up, and discover the magnets are inert. Do the test first — it takes ten seconds:
Take a refrigerator magnet to the exact spot you plan to mount. If it grabs firmly, you have ferrous steel and a magnetic mount will work. If it slides off or feels weak, you have aluminum, fiberglass, EPDM/TPO membrane or a composite panel — go with suction or a clamp.
| Surface | Magnetic | Suction | Clamp / tripod |
|---|---|---|---|
| Steel van or truck roof | Best choice | Works if smooth and painted | Works with rack or rail |
| Aluminum RV roof or siding | No | Works if smooth | Works with rail or ladder |
| Fiberglass / gelcoat (boat, camper cap) | No | Best choice | Works on rails and arches |
| EPDM / TPO rubber membrane roof | No | No — surface is textured | Best choice, via ladder or rack |
| Glass (windshield, cabin window) | No | Best choice | Not applicable |
Step two: place it for sky, not for height
The Starlink Mini needs an unobstructed view of the sky along the arc its satellites travel. Obstructions cause brief dropouts that feel random but are actually periodic — a tree branch clipping the corner of the field of view will knock you offline for a few seconds every few minutes, which is exactly long enough to ruin a video call.
- Use the Starlink app’s obstruction checker from the exact mounting spot before you commit. Hold your phone where the dish will sit, not where you’re standing.
- Keep clear of your own vehicle. Roof AC units, luggage pods, kayak racks, radar domes and raised bunks are the most common self-inflicted obstructions.
- Mount toward the open side. If you park with trees on one side, put the dish on the other. Two feet of lateral movement often beats two feet of height.
- Mind the tilt. An adjustable mount lets you angle the dish toward open sky when you’re parked on a slope. The Ravion magnetic mount adjusts through 20°–30° for exactly this.
Installing a magnetic mount, correctly
- Clean both surfaces. Grit trapped under a magnet is what scratches paint. Wipe the roof and the magnet faces.
- Set it down, don’t slide it. Place the mount straight down onto the surface. Dragging a 240 lb magnet array across paint is how you get swirl marks.
- Confirm full contact. All four magnets need to sit flat. A mount straddling a body crease or rain gutter loses most of its holding power.
- Set the tilt, then run the cable. Route the cable so it can’t flap, and leave a drip loop so water runs off rather than down into a connector.
- Add a safety tether if you’ll be driving. A short lanyard to a roof rack or mirror costs nothing and turns a worst-case into an inconvenience.
The Ravion® Magnetic Battery Mount is stainless steel with four high-strength magnets rated to 240 lbs of holding force. That figure is a shear/pull rating on clean flat steel — real-world holding is always lower on a curved or painted surface, which is why full contact and a tether matter.
Installing a suction mount, correctly
- Clean with alcohol, not soap. Wax and polish residue is the number one cause of a suction cup letting go. Wipe the surface and the cup face.
- Press firmly, then lock. Push the air out before engaging the lever so the cup pulls a full vacuum.
- Check it again in an hour. Suction cups relax slightly as they settle, especially in temperature swings. Re-seat once and it will hold far longer.
- Avoid direct summer sun on hot glass where you can. Heat softens the cup and shortens hold time.
The Ravion® Suction Cup Battery Mount uses industrial-grade vacuum cups on a carbon steel bracket and ships with two spare cups — worth having, because cups are the wear item in any suction system.
The most flexible option: a 1/4″-20 bracket
1/4″-20 is the universal camera thread. Put that thread on a Starlink Mini and the entire photography and van-life mounting ecosystem opens up: tripods, ball heads, magic arms, pole clamps, rail clamps, ladder clamps, window mounts, and RAM-style arms.
This is the answer for the surfaces that defeat both magnets and suction — a rubber membrane RV roof, a textured truck bed cover, a boat’s rail or radar arch. The Ravion® 1/4″-20 Thread Bracket & Stabilizer installs tool-free and includes a stabilizer to stop the dish from oscillating in wind, which is the usual failure mode of a tripod-mounted dish.
Can you drive with it mounted?
Two separate questions get tangled here, and they have different answers.
Will it stay on? On clean steel with full magnet contact, a properly seated magnetic mount holds a Mini at normal road speeds. But wind load rises with the square of speed, crosswinds and passing trucks add sudden gusts, and a roof that flexes over a bump momentarily reduces contact. Always add a safety tether, re-check the mount at every stop, and take it down before highway speeds if you have any doubt.
Will it work while moving? That depends on your Starlink service plan, not your mount. In-motion use requires a plan that permits it. Check your plan in the Starlink app before assuming a moving setup will stay online.
Also worth knowing: a mounted dish is exposed to weather continuously, not just while you’re using it. That is why an IP65-rated clip-on battery matters on a vehicle setup — the power source rides outside with the dish rather than forcing a cable run back inside.
Which mount for your setup
| Your setup | Start with | Why |
|---|---|---|
| Cargo or camper van (steel roof) | Magnetic mount | Fastest, strongest, adjustable tilt, nothing to install |
| Class A / C RV (fiberglass or membrane roof) | 1/4″-20 bracket + ladder or rail clamp | Magnets and suction both fail on these surfaces |
| Boat (gelcoat, rails, arch) | Suction mount or 1/4″-20 bracket | Gelcoat suits suction; rails suit clamps |
| Pickup truck | Magnetic mount | Steel cab roof or toolbox lid is ideal |
| Rental car or hotel window | Suction mount | Glass-friendly and fully reversible |
| Base camp / job site | 1/4″-20 bracket on a tripod | Repositionable for the best sky view |
Five mistakes to avoid
- Buying a magnetic mount for an aluminum roof. Test with a fridge magnet first.
- Mounting for height instead of sky view. Height only helps if it clears an obstruction.
- Sliding a magnetic mount into position. Lift and place. Never drag.
- Skipping the drip loop. Water follows the cable straight into the connector otherwise.
- Suction cups on a waxed surface. Alcohol-wipe first, every time.
Frequently asked questions
How do you mount a Starlink Mini without drilling?
Use a magnetic mount on steel surfaces, a suction-cup mount on glass or smooth fiberglass, or a 1/4″-20 bracket with a tripod, pole clamp or rail clamp on anything else. All three are fully reversible and leave no holes.
Will a magnetic mount stick to an RV roof?
Usually not. Most RV roofs are aluminum, fiberglass or rubber membrane, none of which are magnetic. Test with a refrigerator magnet first; if it doesn’t hold, use a clamp-style 1/4″-20 mount on a ladder, rail or roof rack instead.
Will a magnetic mount damage my paint?
Not if you clean both surfaces first and place the mount straight down instead of sliding it. Trapped grit, not the magnet itself, causes scratches. Lift the mount off rather than dragging it when you remove it.
Can I drive with a Starlink Mini on a magnetic mount?
A properly seated magnetic mount on clean steel holds at normal road speeds, but always add a safety tether and re-check the mount at every stop. Whether the dish stays connected while moving depends on your Starlink service plan permitting in-motion use.
How high should I mount a Starlink Mini?
Only as high as it takes to clear obstructions. A clear view of the sky matters far more than absolute height, and moving the dish a couple of feet sideways away from a tree or an AC unit usually helps more than raising it.
Do suction cup mounts hold in the rain?
Yes — a vacuum seal is unaffected by rain. What hurts suction is a dirty or waxed surface, a textured surface, and large temperature swings. Clean with alcohol, re-seat after the first hour, and check periodically.
What thread does a Starlink Mini use?
The Starlink Mini has a built-in mounting provision, and a 1/4″-20 adapter bracket makes it compatible with standard camera tripods, ball heads, clamps and pole mounts — the same universal thread used across photography hardware.
Tool-free mounts for the Starlink Mini
Magnetic Battery Mount — 240 lbs hold, 20°–30° tilt, stainless steel. Suction Cup Battery Mount — industrial vacuum cups, carbon steel bracket, two spare cups included. 1/4″-20 Thread Bracket & Stabilizer — fits any tripod or clamp. All ship free in the US with a 12-month warranty and 30-day returns.