
Setting up Starlink Mini for boats means solving a problem RVs and campsites never have: cell service disappears the moment you clear the breakwater, and marina Wi-Fi rarely reaches past the first row of slips. This guide walks through building a marine-ready power setup that survives salt spray, vibration, and long days away from the dock.
Quick Take
- An IP65-rated battery and marine-grade mount are non-negotiable for boats
- Vibration-proof mounting keeps the dish locked on target through wake and chop
- Charging from the boat’s 12V/24V system means you never run out of runway
Why Starlink Mini for Boats Needs a Different Power Strategy Than RVs
A campsite is flat, dry, and stationary. A boat is none of those things. Salt air corrodes exposed metal and connectors far faster than desert dust or campground rain, curved rails and fiberglass decks leave little flat mounting space, and constant wake and chop shake loose anything that is not clipped down. Most boats also do not run a 24-hour inverter the way a camper or RV does, so power for your Starlink Mini has to come from somewhere else: a dedicated battery, the boat’s own 12V or 24V system, or both.
The Three Requirements for Reliable Marine Starlink Power
Before picking gear, it helps to know what marine conditions actually demand from a power setup.
Ravion® · Built only for Starlink Mini
Run your Mini up to 9 hours, no outlet.
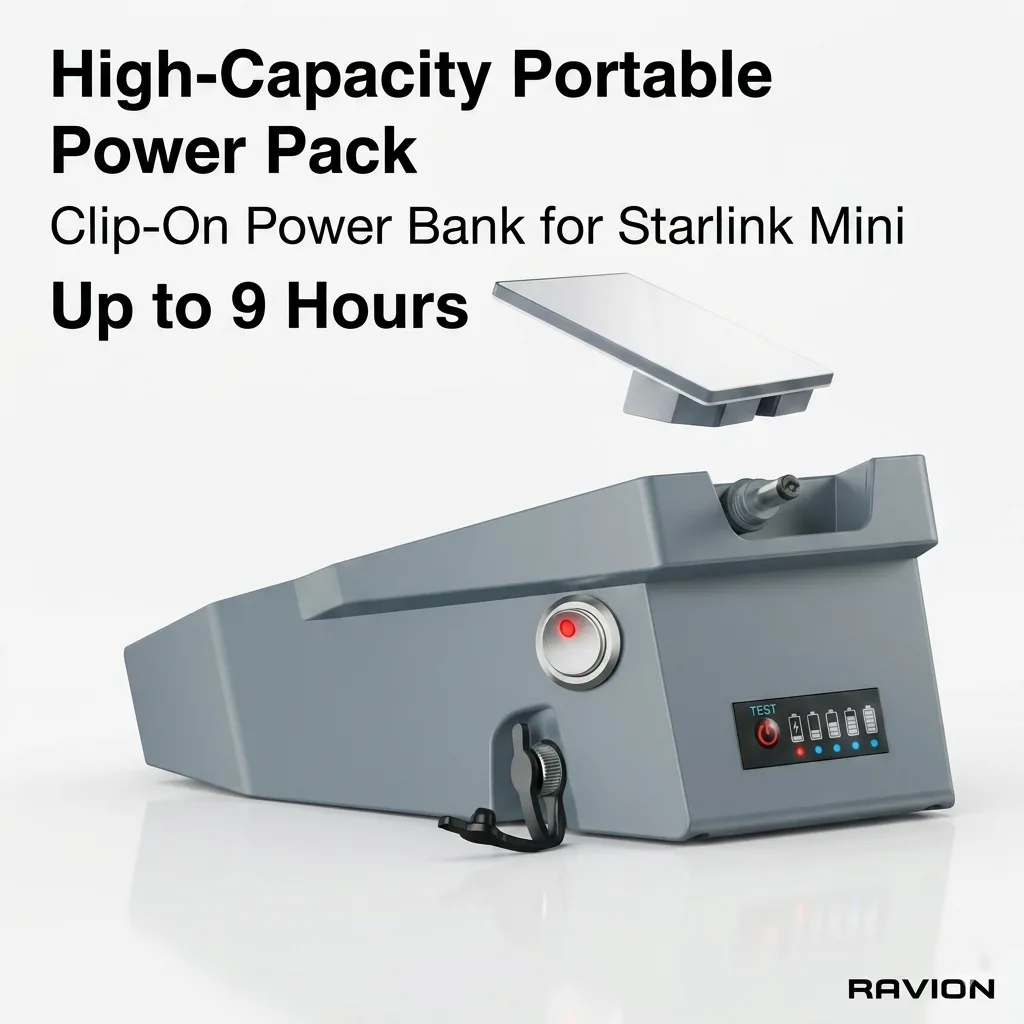
Ravion® Battery
158Wh · up to 9 h runtime · IP65 · 2.6 lbs · Under FAA 160Wh limit
$328 Shop now →
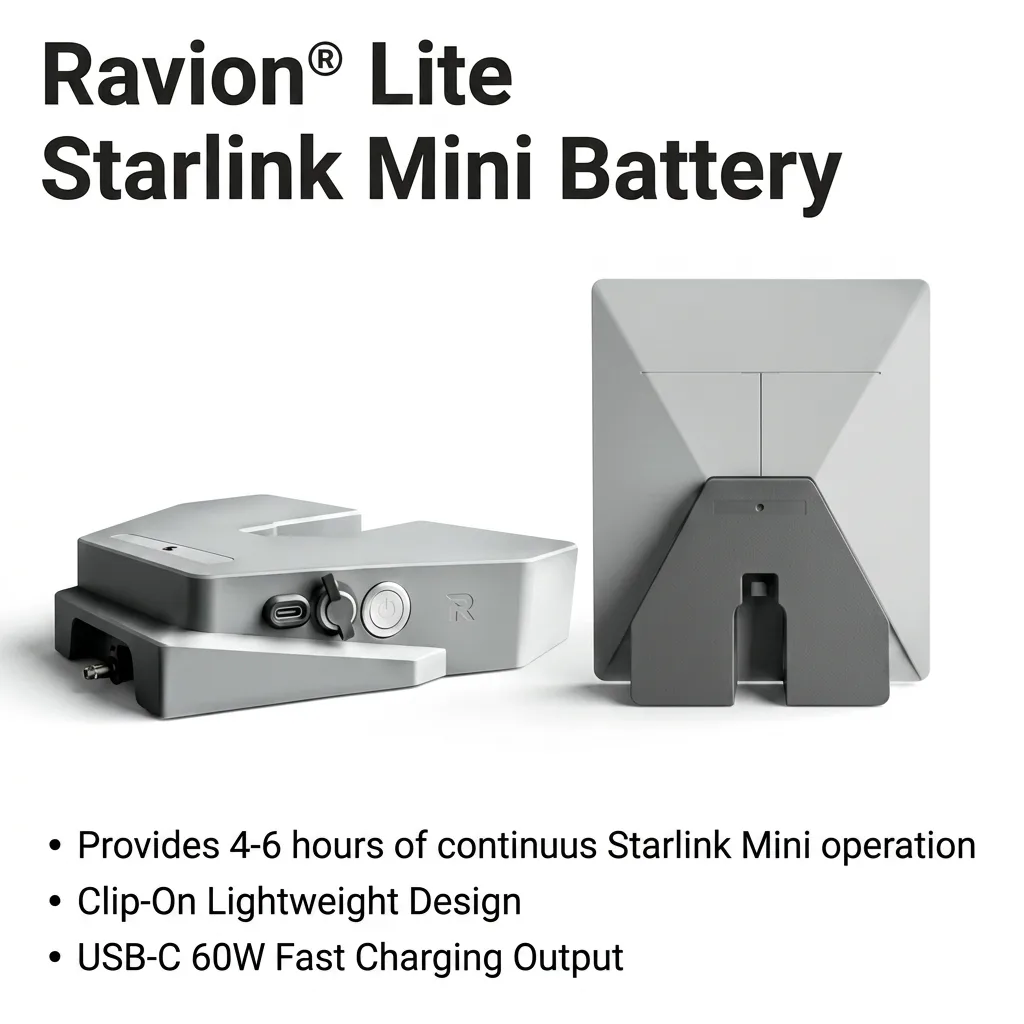
Ravion® Battery Lite
99Wh · up to 6 h runtime · 1.9 lbs · USB-C 60W out
$189 Shop now →
Free U.S. shipping · 30-day returns · 12-month warranty · Ships from California in 1 business day · See all power kits
1. A Sealed, Waterproof Battery
An IP65 rating means a battery is fully dustproof and rated to handle sustained water jets, not just the occasional splash. On a boat, that matters less for rain and more for salt spray, which coats every exposed surface within a few hours underway and works its way into connectors that are not sealed.
2. A Mount That Holds Under Way
Wake, chop, and turns put real lateral force on anything mounted above deck. A tool-free mount that clips on securely, rather than a bracket that relies on friction alone, is the difference between a Starlink Mini that stays put and one that ends up in the water.
3. A Way to Recharge From the Boat’s Own Power
A battery alone gives you hours; tying into the boat’s house bank gives you days. A 12V or 24V DC adapter lets you top off your battery while the engine or house bank is running, so you are not starting every trip on a partial charge.
Building the Kit: What We Recommend
Here is the gear that checks all three boxes above, built specifically for Starlink Mini.
Ravion® Battery (158Wh)
The 158Wh Ravion Battery delivers up to 9 hours of Starlink Mini runtime, is IP65 rated, and supports pass-through charging so it can run the dish while topping itself off from the DC adapter. At 2.6 lbs it also flies carry-on — 158Wh sits in the FAA 101–160Wh band, so it is carry-on only and your airline must approve it first — which matters if you fly to meet the boat at a charter dock.
Ravion® Battery Lite
For smaller day boats, dinghies, or center consoles where every pound of gear matters, the 99Wh Lite weighs 1.9 lbs and adds USB-C 60W charging for phones and handheld electronics alongside 4 to 6 hours of Starlink Mini runtime.
Ravion® Suction Cup Battery Mount
Industrial-grade suction cups on a rust-resistant carbon steel bracket work well on hardtops, windshields, and cabin roofs. Two spare cups are included since salt residue wears rubber faster on the water than it does on land.
Ravion® Magnetic Battery Mount
With 240 lbs of holding force across four magnets and a stainless steel body, this mount is a better fit for metal rails, targa bars, and outriggers, where stainless resists corrosion better than mild steel hardware.
Ravion 12-24V DC Power Adapter
This adapter ties your Ravion battery into the boat’s 12V or 24V house bank so it recharges while you run, with an aluminum heat-sink enclosure plus over-current, over-voltage, and thermal protection for the electrical noise typical of a marine engine bay.
Ravion® Battery Travel Case
Between trips, or whenever the boat is hauled out, salt air will find any gear left exposed in a locker. The EVA hard-shell case with YKK waterproof zippers keeps the whole kit dry and organized dockside.
Step-by-Step: Mounting and Wiring Starlink Mini on a Boat
- Pick a mounting point with a clear, unobstructed view of the open sky, away from radar arches or antennas that could cause interference.
- Attach your chosen mount: suction for glass, fiberglass, or gelcoat surfaces, magnetic for stainless or aluminum rails and towers.
- Clip the Ravion battery onto the Starlink Mini. No tools or cables are needed for this step.
- Route the DC adapter to a fused connection on the house bank. For any permanent wiring, have a qualified marine electrician make the final connection.
- Power on and check the Starlink app for obstructions or signal issues before getting underway.
Protecting Your Setup From Corrosion
Rinse the dish, battery, and mount with fresh water after any saltwater exposure, and wipe connectors dry before storing them. Between outings, keep the kit in the travel case rather than a damp locker, and check mount hardware periodically for early signs of corrosion. These habits matter on land too; several of the same power habits that cause reboots and dropouts on RVs and campsites apply just as directly on the water, which we cover in our guide to common Starlink Mini power mistakes.
How Long Will It Run Without Shore Power?
Actual runtime depends on signal conditions, temperature, and how hard the dish works to hold a connection.
For a full breakdown of what affects Starlink Mini battery life, see our guide on how long the Starlink Mini runs on battery. Both Ravion batteries also accept solar input, which extends a multi-day trip at anchor well beyond a single charge.
Frequently Asked Questions
Is Starlink Mini actually safe to use in a saltwater environment?
Starlink Mini itself is weather resistant, and an IP65-rated battery like the Ravion Battery adds the same protection to your power source. Rinsing gear with fresh water after saltwater exposure is still recommended to prevent long-term corrosion on connectors and hardware.
What’s the best mount for a boat, suction or magnetic?
Use suction cups on smooth, non-porous surfaces like glass, fiberglass, or gelcoat. Use a magnetic mount on stainless or aluminum rails, towers, and targa bars, where its 240 lbs of holding force resists vibration at speed.
Can I wire my Starlink Mini power system directly into my boat’s battery bank?
Yes, using a 12V or 24V DC adapter designed for the purpose. For any permanent connection into your boat’s electrical system, have a qualified marine electrician handle the wiring to protect both your electronics and your boat’s existing circuits.
How long will a Ravion battery run Starlink Mini without recharging at anchor?
The 158Wh Ravion Battery runs up to 9 hours on a single charge under typical conditions, and the 99Wh Lite runs 4 to 6 hours. Pairing either with solar input or the DC adapter extends that well past a single day at anchor.
Do I need a different setup if I trailer my boat between marinas and campsites?
Not really. The same Ravion battery, suction or magnetic mount, and DC adapter that work on the water also work in an RV or truck bed, so trailerable boat owners can use one kit for both. Our guide to Starlink Mini for camping covers the land-based side of that setup in more detail.
Is it worth setting up Starlink Mini for boats specifically?
Yes. Setting up Starlink Mini for boats with a sealed IP65 battery and a vibration-rated mount costs more than a generic power bank, but it is the only setup built to survive salt spray, chop, and the boat’s 12V system long term.
Ready to Get Your Boat Connected?
A marine-ready Starlink Mini setup comes down to three things: a sealed battery, a mount that holds under way, and a charging path that does not depend on shore power. Shop the full Ravion lineup and mounting options to build a kit that is ready for your next trip out.
Gear Used in This Guide
- Ravion® Battery (158Wh)
- Ravion® Battery Lite
- Ravion® Suction Cup Battery Mount
- Ravion® Magnetic Battery Mount
- Ravion 12-24V DC Power Adapter
- Ravion® Battery Travel Case